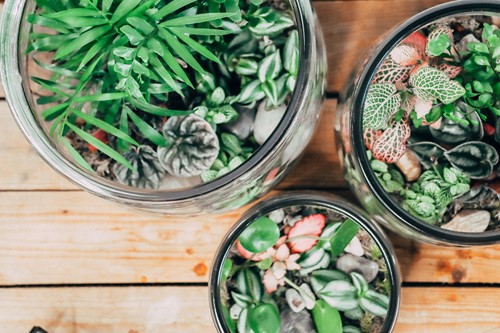
Terrariums are perfect for plant lovers who want to make their plants look like a work of art. While there are plenty of terrarium containers and kits available to buy, it’s very easy to make one yourself using other items. We’ll go over the steps to create your very own DIY terrarium for displaying plants in your home.
What You’ll Need
Terrariums leave lots of room for creativity, but require a few ingredients to be successful. You’ll need to have potting soil, your choice of plants and a small amount of activated charcoal. The charcoal will be crucial in soaking up extra moisture and preventing bacteria from growing in your mini-garden. Other recommended materials are decorative pebbles, sea glass or stones and sheet moss if you want to create an extra lush environment.
You’ll also need the most important piece: a glass vessel. Mason jars and other glass containers with lids work well, but you can also use vases or fish bowls for an open-air terrarium.
Which Plants to Choose?
The best plants for a terrarium depend on the type of glass vessel you use. If you are using a vessel with a lid, your terrarium will have a humid environment perfect for miniature tropical plants. If you’re going without a lid, it will dry out much quicker, making it great for succulents or cacti. If you are going to use a closed-lid terrarium, however, avoid succulents and cacti. The environment will be too moist for them and could cause damage to your plants.
Some suggested plants for your tropical terrarium include: small ferns, nerve plant, prayer plant, pothos and club moss.
For a drier, open air container, add succulents, cacti or even air plants.
How to Set Up Your Terrarium
The key to a healthy and attractive terrarium is to build in layers. Here are the steps:
Add a layer of sheet moss or stones to the very bottom of the vessel to absorb moisture. Next, add the activated charcoal. Taller vessels like vases and large jars will need thicker moisture-absorbing layers than shallow containers.
Scoop the potting soil in, making sure it’s deep enough for the roots of your largest plant. Shake loose any extra soil attached to the roots of your plants before adding them. You can also trim the roots if they are especially long, which will slow the plant’s growth and keep it terrarium-sized.
Beginning with the largest and building your design around it, add your plants. It’s a good idea to plan your arrangement before building to make sure everything will fit. With your fingers or a spoon, dig small holes in the soil for each plant and set them in securely.
For a finishing touch, add a layer of decorative pebbles, stones, sea glass or more moss depending on preference. To maintain a healthy terrarium, mist occasionally with a spray bottle. For an open-air container, water the soil directly after letting it dry out completely.
Once you have the basics covered, you’ll find there’s no limit to the amount of creative arrangements you can make. Terrariums make excellent centerpieces, decorative accents and gifts. Experiment with terrarium building and enjoy the satisfaction of plant care combined with DIY craft.
About the Author
